
Quick Start
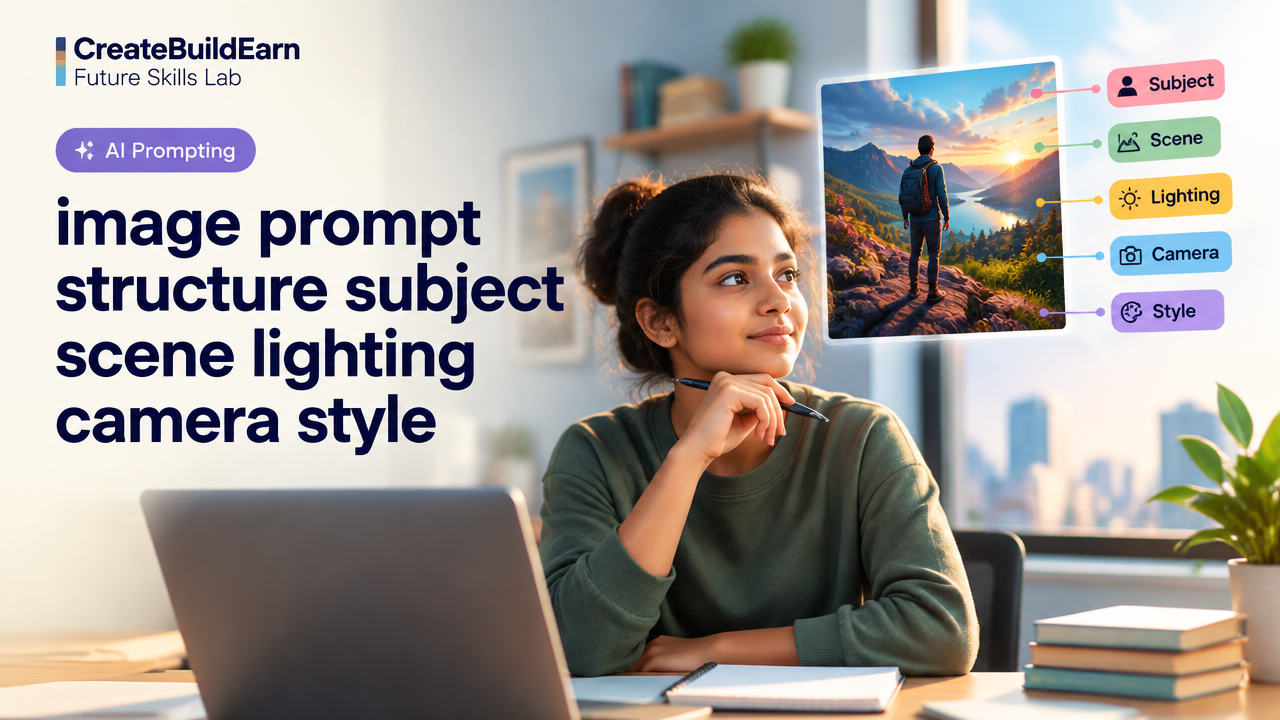
- What you will learn/build: How to write an image prompt with clear parts—subject, scene, lighting, camera and style—without referencing or copying an individual artist.
- Skill level: Beginner (useful for students, creators, and hobbyists).
- Time needed: 30–90 minutes to learn and complete the mini-project.
- What you need: Any AI image tool or generator, a text editor (notes app), and curiosity. No paid accounts required—use free trials or offline tools where available.
Introduction
AI image tools work best when given clear, structured prompts. That means separating the main idea into a few simple parts: subject (who/what), scene (where/how), lighting (mood), camera (view and technical feel) and style (finish and medium). This article teaches a safe, practical workflow so your prompts are specific and original—without copying named artists or infringing on creative rights.
Why Structure Matters
When prompts mix ideas or skip details, AI outputs become vague or inconsistent. A structured prompt helps you control composition, mood, and the final look. It also makes editing easier: change the lighting without changing the subject, or swap camera directions without altering the scene.
Core Elements: What Each Part Means
- Subject: The main focus—person, object, animal, or abstract concept. Include key traits (age range, clothing, expression) when needed.
- Scene: The setting and action. Where is the subject? What are they doing? Mention time of day, environment, weather, props, or surrounding activity.
- Lighting: Type and mood: soft, harsh, backlit, golden hour, neon, dramatic rim light, or flat studio light. Lighting defines atmosphere.
- Camera / Composition: Perspective and technical hints: close-up, medium shot, wide shot, low angle, aerial, depth of field (shallow/deep), lens focal length, or film vs digital feel.
- Style / Finish: Medium and tone: photo-realistic, watercolor, flat vector, retro film grain, pastel illustration, or minimal line art. Use neutral style descriptors instead of naming living or deceased artists.
How to Format a Clear Prompt (Template)
Use a step-by-step template you can reuse. Write each element separated by commas or line breaks so the generator can parse intent.
[Subject] — [Scene / Action] — [Lighting & Mood] — [Camera / Composition] — [Style / Finish]
Example template filled briefly: “Young man on a rooftop, sunset city skyline behind him, warm rim light, low-angle medium shot, cinematic film grain, vibrant but natural colors.”
Worked Example: Build a Prompt Step-by-Step
Goal: Create a safe, original prompt for a striking portrait without referencing any artist names.
- Subject: “Young woman in a yellow raincoat” — clear and simple.
- Scene: “riding a bicycle through monsoon-soaked Mumbai street, puddles reflecting neon shop signs” — includes location, action, and environment cues.
- Lighting: “soft golden-hour glow mixed with cool neon reflections, subtle backlight” — sets mood and contrast.
- Camera: “low-angle medium shot, shallow depth of field, 50mm lens feel” — tells composition and focus.
- Style: “photo-realistic with warm color grading and light film grain, slightly high contrast” — finish and color mood without naming artists.
Combined prompt (ready to paste):
Young woman in a yellow raincoat riding a bicycle through a monsoon-soaked Mumbai street, puddles reflecting neon shop signs — soft golden-hour glow mixed with cool neon reflections, subtle backlight — low-angle medium shot, shallow depth of field, 50mm lens feel — photo-realistic, warm color grading, light film grain, slightly high contrast.
This prompt is specific, original, and avoids referencing any artist names or copyrighted style labels.
Practical Prompt Variations and Small Tweaks
- Change lighting to “dramatic side light” to increase contrast and mood.
- Swap camera to “aerial wide shot” to capture the whole street instead of a portrait.
- Alter style to “watercolor texture with soft edges” to move from photorealism to an illustration feel.
Try It Now / Mini Project
Your task: write three different prompts for the same subject but different moods.
- Choose one subject (e.g., “schoolboy with a backpack”).
- Write Prompt A — Bright and optimistic: scene, lighting, camera, style.
- Write Prompt B — Moody and dramatic: swap lighting and camera; keep subject.
- Write Prompt C — Stylized illustration: change style and composition.
Run the three prompts in your chosen image tool. Save the outputs and note what changed. Try small wording edits (e.g., “soft” → “harsh”) and compare results.
Checkpoint: Self-Review Questions
- Does your prompt identify the subject clearly? (Who or what is the focus?)
- Is the scene specific enough to give context? (Where and what action?)
- Have you stated lighting and camera cues separately from the style?
- Did you avoid naming or imitating a particular artist or copyrighted style?
- Can you change one element (lighting or camera) and predict how the image will change?
Common Mistakes and How to Fix Them
- Too vague: “A person in a city” → add descriptors: age group, clothing, time of day, action.
- Too many conflicting cues: Asking for both “soft pastel” and “harsh studio light” can confuse the model—decide the dominant mood.
- Copying artists: Avoid phrases like “in the style of [artist]”. Instead use neutral descriptors: “bold brush strokes, saturated colors, impressionistic composition.”
- Overloading with technical terms: Keep camera hints helpful (angle, lens feel, depth) but don’t overload with contradictory settings.
Review Checklist (Quick Table)
| Checklist Item | Yes / No | Notes |
|---|---|---|
| Is the subject explicit? | ||
| Is the scene/location clear? | ||
| Is lighting described (mood + direction)? | ||
| Is camera/composition indicated? | ||
| Is the style described without naming artists? | ||
| Any conflicting or redundant cues? |
Next Practice / Roadmap
After this exercise, try these next steps:
- Create a small series: three related prompts that form a visual story (morning, midday, night).
- Study aspect ratio and resolution basics to prepare images for web or print: see Aspect Ratio, Resolution, File Format & Tools for Creators Explained.
- Plan a poster using a generated image and a layout guide: try the AI Poster Project Prompt: Plan, Create, Review and Improve.
- Pair image generation with AI text tools for captions and context; learn to use AI responsibly: How to Use AI as a Tutor Without Letting It Do All the Thinking.
Frequently Asked Questions
Can I reference an artist’s name in a prompt?
It’s better to avoid direct artist references. Many platforms restrict style copying and using a named artist risks producing derivative or copyrighted outputs. Use descriptive, non-attributive language about colors, brushwork, era, or medium instead.
Should I include camera brand or lens model?
You can include camera-like descriptors (e.g., “50mm lens feel,” “shallow depth of field,” “wide-angle, cinematic”) to suggest perspective. Specific brand names are not necessary for a clear result.
How long should a prompt be?
There is no fixed length. Focus on clarity and relevance. Short, well-structured prompts of 15–40 words often work better than long, contradictory lists. Use the template sections to stay concise.
How do I avoid biased or harmful content in generated images?
Avoid prompts that target protected attributes (race, religion, gender stereotypes), and check outputs for respectful representation. If a result is biased or harmful, rephrase to be neutral and avoid stereotypes.
What if the generator ignores my instructions?
Make one change at a time and rerun. Start with stronger, clearer wording for the element being ignored (e.g., change “soft light” to “soft, warm front light; no harsh shadows”). If issues persist, consult the tool’s help or try a different generator.
Can I use generated images commercially?
License and usage rules vary between tools. Always check the specific platform’s terms before using generated images for commercial work, selling prints, or submitting to clients.
How do I learn to judge lighting and camera terms?
Practice by matching real photos to descriptions. Take simple photos with your phone or study photography references and note how lighting direction, time of day and lens choice change the look.
Conclusion
Using a clear, repeatable prompt structure—subject, scene, lighting, camera and style—helps you produce predictable, original images while avoiding direct imitation of artists. Start small, compare variations, and use the mini-project to build a short portfolio of different moods. Next skill to learn: how to prepare generated images for web or print—study aspect ratio, resolution and file formats next.
Related learning paths and projects: AI Poster Project Prompt, Aspect Ratio, Resolution, File Format & Tools, How to Use AI as a Tutor.
Learn it by building something
Use the guide as a learning checklist, build a small version yourself, test it, explain what you learned and then improve the project.
How this guide was prepared
This guide is prepared for everyday readers using practical research, usability checks and editorial review. Product or tool-specific claims should be verified against current official documentation when needed.
How did you like this article?
Your feedback helps us make our guides more useful.

Join the Discussion
Join the conversation and share a useful tip, question or experience.