
Quick Start
What you will learn/build: Basic roles of sensors, actuators and controllers in simple robots. How to wire and code a small line-following robot (Arduino). One safe mini project: an obstacle-avoidance rover.
Skill level: Beginner (no prior electronics required). Basic comfort with reading instructions and simple wiring helps.
Time needed: 2–6 hours total: 1–2 hours learning and planning + 1–3 hours building and testing.
What you need: Arduino Uno (or clone) or simple microcontroller, 2 DC motors + driver (L298N or TB6612), 2–3 IR or line sensors, jumper wires, breadboard, small battery pack (7.4–12V) or USB power, chassis/wheels, screwdriver, basic multimeter (optional).
Why learn these robotics basics?
Robots are systems that sense their environment, decide, and act. Learning sensors, actuators and controllers gives you the core language of robotics. With these building blocks you can design small projects that teach programming, electronics and system thinking—skills useful for future technology work and maker portfolios.
Core components: Sensors, Actuators, Controller
Keep these simple definitions in mind:
- Sensors convert physical phenomena into electrical signals (distance, light, temperature, touch).
- Actuators convert electrical signals into physical motion or effects (motors, servos, relays, buzzers).
- Controller is the brain that reads sensors, runs logic and sends commands to actuators (microcontroller like Arduino or single-board computer like Raspberry Pi).
Signals, power and communication — simple technical overview
Beginner-friendly signal types:
- Digital — ON/OFF values (0/1). Good for switches and digital sensors.
- Analog — continuous voltages (e.g., 0–5V). Useful for light sensors or some distance sensors.
- PWM (Pulse Width Modulation) — simulates analog control for motor speed or LED brightness.
- I2C, SPI, UART — simple communication buses used by advanced sensors and modules.
Power basics: match voltage ratings (Arduino runs at 5V logic; many motors need 6–12V). Always power motors separately from the microcontroller when possible, and connect common ground.
Common sensors and actuators for beginners
- Distance sensors: Ultrasonic (HC-SR04), IR distance modules.
- Line/reflectance sensors: IR emitter + photodiode arrays for line following.
- Light sensors: LDR (photoresistor) or photodiodes.
- Temperature/humidity: DHT11/DHT22.
- IMU: Accelerometer/gyroscope (MPU6050) for motion sensing.
- Actuators: DC motors (drive with motor driver), servos (precise angle), stepper motors (precise position), relays (switching higher voltages).
Simple project ideas and when to choose them
- Line follower — teaches analog/digital reading and motor control. Good first robot.
- Obstacle-avoidance rover — adds distance sensing and decision-making.
- Buzzer alarm with light sensor — simple project for inputs and outputs.
- Remote-controlled car — introduces wireless modules (HC-05 Bluetooth) or RF modules.
- Balancing bot — advanced; uses IMU and control loops (PID).
Worked example: A simple two-wheel line-following robot (overview)
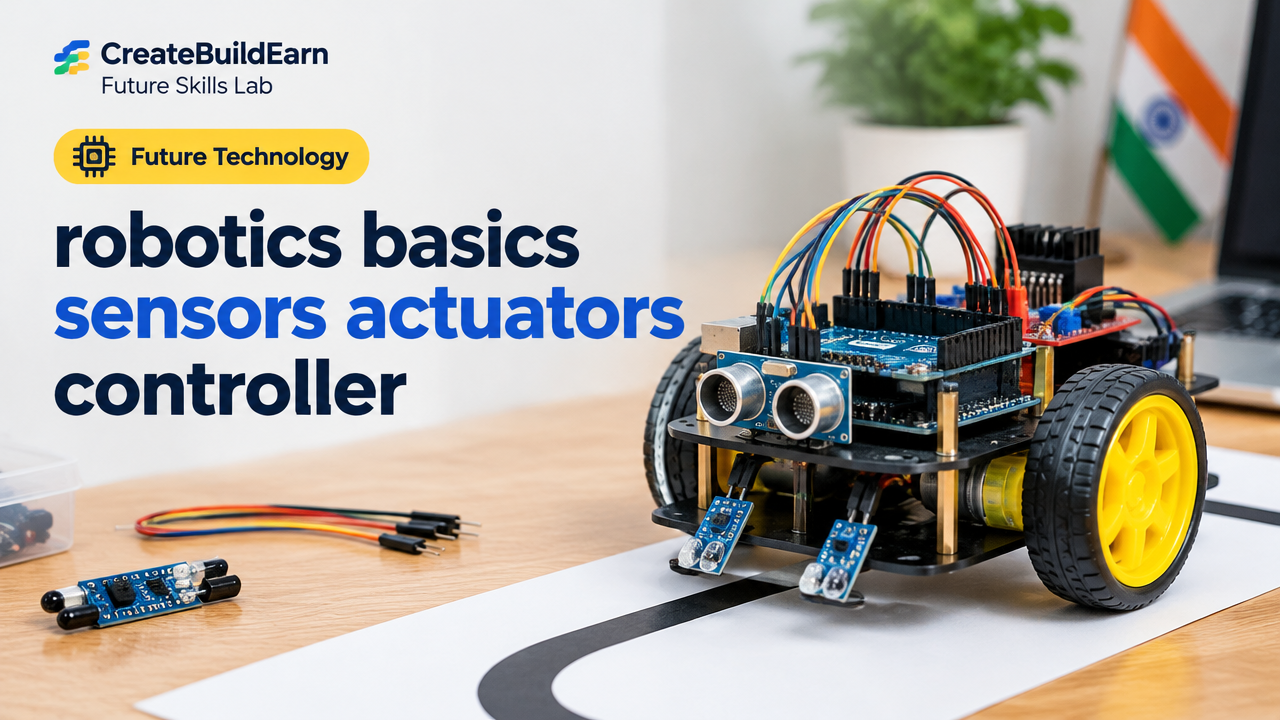
Concept: Two IR reflectance sensors under the front of the robot read surface reflection. The controller reads those sensors and adjusts motor speeds to keep the robot on a black line on white background.
Electronics sketch:
- Arduino Uno
- 2 DC motors with gearbox, connected to L298N motor driver
- 2 IR line sensors connected to analog inputs A0 and A1
- Battery pack powering the motors and Arduino (common ground)
Simple Arduino logic (learning example): read sensors, if left sees black, slow/stop left motor and run right motor to turn right; mirror for right sensor; if both see white, go forward.
// Line follower learning example (conceptual)
const int leftSensor = A0;
const int rightSensor = A1;
const int leftPWM = 5;   // PWM output to motor driver
const int rightPWM = 6;

void setup() {
  pinMode(leftPWM, OUTPUT);
  pinMode(rightPWM, OUTPUT);
  Serial.begin(9600);
}

void loop() {
  int L = analogRead(leftSensor);   // higher value = more reflectance (adjust per sensor)
  int R = analogRead(rightSensor);

  // Thresholds must be tested on your surface
  int threshold = 600;

  if (L < threshold && R < threshold) { // both see black line
    analogWrite(leftPWM, 120);
    analogWrite(rightPWM, 120);
  } else if (L < threshold) { // left on line => turn right
    analogWrite(leftPWM, 0);
    analogWrite(rightPWM, 120);
  } else if (R < threshold) { // right on line => turn left
    analogWrite(leftPWM, 120);
    analogWrite(rightPWM, 0);
  } else { // no line, stop
    analogWrite(leftPWM, 0);
    analogWrite(rightPWM, 0);
  }
  delay(50);
}
Notes: This is a conceptual learning example. Tune thresholds and PWM values for your sensors and motors. Use motor driver enable/direction pins properly for your chosen driver.
Materials checklist
| Item | Why | Notes |
|---|---|---|
| Arduino Uno or compatible | Controller | Clone boards work fine |
| Motor driver (L298N/TB6612) | Drive motors safely | Protects Arduino from motor currents |
| 2 DC motors + wheels | Motion | Choose matched gearbox motors |
| Line sensors or IR modules | Detect line | Test to find threshold values |
| Battery pack (7.4–12V) | Power motors | Separate from logic power if possible |
| Jumper wires, chassis, screws | Assembly | Keep spare wires |
Step-by-step path: from idea to working robot
- Start with a simple schematic on paper: mark sensors, motors and power sources (Design before building).
- Gather parts and test each component separately (sensor reading in Serial Monitor, motor spin via driver).
- Wire the microcontroller, ensure common ground and safe power connections.
- Write minimal code to read sensors and print values to serial. Tune thresholds.
- Add motor control steps. Test slowly and add delays if needed.
- Iterate: adjust thresholds, motor speeds and sensor placement.
- Document your build with photos, wiring notes and final code for a portfolio.
Try It Now / Mini Project: Obstacle-Avoiding Rover
Goal: Build a small rover that drives forward and turns when the ultrasonic sensor detects an obstacle within ~20 cm.
- Parts: Arduino, HC-SR04 ultrasonic sensor, 2 DC motors + driver, chassis, battery, wires.
- Mount the ultrasonic sensor on the front so it faces forward.
- Wire the HC-SR04 VCC to 5V, GND to GND, TRIG to a digital pin (e.g., 9) and ECHO to a digital pin (e.g., 10). Use a voltage divider for ECHO if needed on 3.3V boards.
- Write code: measure distance, if distance < 20 cm then stop, reverse a little and turn. Otherwise go forward.
- Test in a safe open area, using low motor speeds first. Tune reversing and turning durations.
This project teaches timed motion control, sensor reading and simple behavior logic. It is safe: use low voltage and keep hands clear of moving parts while powered.
Checkpoint / Self-review
- Can you explain what a sensor, actuator and controller do in one sentence each?
- Have you tested a sensor and printed values to the serial monitor?
- Can you wire a motor through a driver and power it without overloading the microcontroller?
- Did you document wiring and final code for reproducibility?
Common mistakes and how to avoid them
- Not using a common ground: Sensors and motor drivers must share ground with the controller. If not, signals are unreliable.
- Powering motors from the microcontroller: Motors draw more current; always use a separate motor power supply through a driver.
- Skipping sensor calibration: Test sensors on your surface and set thresholds rather than using defaults.
- Loose wiring: Secure connectors and use solder or tight header connections to avoid intermittent faults.
Review checklist before calling the build ‘done’
| Item | Done? |
|---|---|
| All mechanical parts secured | [ ] |
| Power wiring correct and insulated | [ ] |
| Sensors calibrated and tested | [ ] |
| Controller program uploaded and tested | [ ] |
| Documentation (photos, code, notes) | [ ] |
Next practice / Roadmap
After you finish these basics, try:
- Adding PID control to improve line-following accuracy (learn closed-loop control).
- Using IMU data to detect turns and motion.
- Building a Bluetooth remote control for manual override.
- Documenting a clean project page for a portfolio.
Related CreateBuildEarn guides to follow next:
- Beginner Portfolio Before Client Work
- Design Safe No-Code Automation on Paper
- How to Use AI as a Tutor Without Letting It Do All the Thinking
- 4 Week Digital Creator Beginner Learning Path
Frequently Asked Questions
What microcontroller should I start with?
Arduino Uno (or an Arduino-compatible board) is ideal for beginners because of simple I/O, many tutorials and low cost. For camera or vision projects later, consider Raspberry Pi.
Do I need a soldering iron?
Not for the very first builds. You can use jumper wires and breadboards. Soldering gives more reliable, long-term connections for a finished project.
How do I choose a motor driver?
Match the driver to your motor voltage and peak current. L298N is common for simple low-cost projects, TB6612 is more efficient. Check current ratings for your motors.
Can I power motors and Arduino from the same battery?
It is possible but not recommended unless the battery can supply sufficient current and voltage is regulated for the Arduino. Safer option: separate motor battery and regulated 5V for the Arduino with a common ground.
How do I learn to tune sensors?
Print sensor values to the serial monitor, test under the actual conditions (lighting, surface), and set thresholds based on observed ranges. Change placement and angle if readings are unstable.
Is it safe to use Li-ion batteries?
Li-ion and LiPo batteries are common but must be handled carefully. Use proper chargers, avoid short circuits and never leave charging unattended. For beginners, consider NiMH battery packs or powered adapter blocks.
Where should I document my project?
Keep a short project page or PDF with parts list, wiring diagram, code and photos. This makes a good portfolio piece when applying for student projects or internships.
Conclusion and the next skill to learn
Understanding sensors, actuators and controllers lets you design simple, useful robots. Start with a line-follower or obstacle-avoid rover, test carefully and document everything. Next, learn closed-loop control (PID), motor modeling and basic electronics safety. These will let you move from hobby builds to polished, repeatable projects for a portfolio.
Safety reminder: Always disconnect power before changing wiring, use low voltages when possible, and supervise any builds for younger learners. When using AI tools for help, verify suggestions and protect personal data—see our guide on using AI as a tutor.
Learn it by building something
Use the guide as a learning checklist, build a small version yourself, test it, explain what you learned and then improve the project.
How this guide was prepared
This guide is prepared for everyday readers using practical research, usability checks and editorial review. Product or tool-specific claims should be verified against current official documentation when needed.
How did you like this article?
Your feedback helps us make our guides more useful.


Join the Discussion
Join the conversation and share a useful tip, question or experience.